How Can We Help?
Using Late Deals
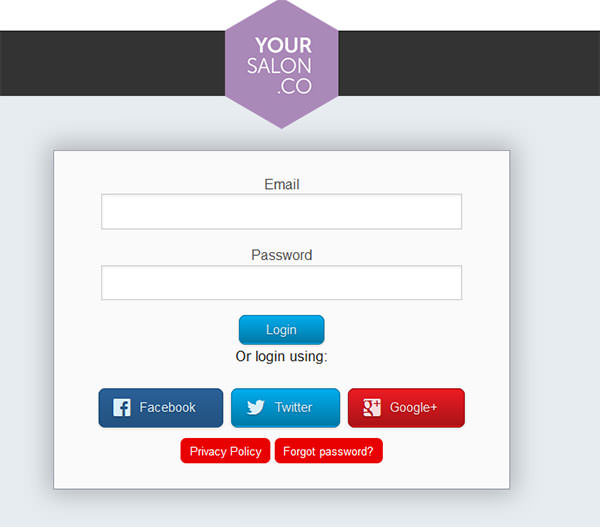 To access your deals go to YourSalon.co and log in with your admin email and password. There is a link if you have forgotten your password.
You will now be in the “backend” of Yoursalon.co with access to all the settings and tools to manage your deals.
Note the grey arrow at the top of the menu. Use that to show/hide the menu if you need more screen space.
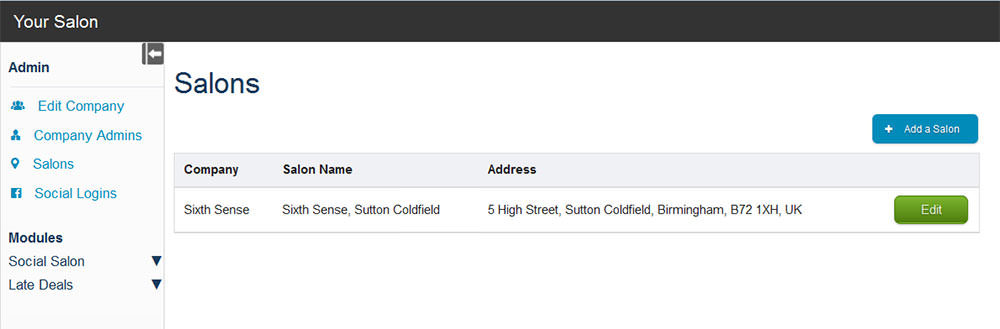
The Admin menu has these sub sections:
Edit Company. This page has many settings and most are self-explanatory.
These notes will guide you on the less obvious fields.
Description allows full text and web links. Use them to link to your website with some valuable SEO phrases. E.g. “best salon Sutton Coldfield”.
Your facebook URL (web address) should look like this https://www.facebook.com/plusyoursalon
Twitter is ONLY the name after the @
Company Admins. On this menu you can add new people who can log in and add/edit deals. You can also change your password at any time.
Salons. You may have more than one salon so you can add all of your locations here. You can group your deals into blocks for each salon to make it easy for clients to claim deals for specific salons. You can also use locations to separate Hair from Beauty or Barbering.
Social Logins. If you want to log in with a social media account you can use this page to attach your social login to the admin email you have used.
We have designed these tools to be easy to use each week. Most salons delegate this task to reception once a week.
Under the Late Deals menu:
Visit Active Deals to see your deals, add new ones or edit deals.
Note: Once a deal is past its end-date it will not be active and will appear in Expired Deals (the next step down the menu).
There is a blue button at the top right to “Add a Deal”. A pop-up form will let you enter all the info needed. The same pop-up is used for editing a deal.
 The deal data –
Choose a suitable deal icon from the dropdown.
Title is a short (max 35 characters) description e.g. Cut & Finish
Display From and To dates to control when the deal is visible. (E.g. perhaps you want to add some deals to run from Monday to Thursday. You could go onto the site at the weekend and create the deals ready for Monday. Simply set the From as the Sunday and the To as the Thursday. )
Date of Deal is a text box to tell the client when it can be used. Typical value could be – 'any Monday' or 'Mon & Tues' or 'Monday 18th'.
Description lets you add more detailed information. This is only needed for more complex services or packages.
Original Price is the price before discount. You do not need to add a currency symbol (see settings)
Deal Price is the price after the discount
How Many is the quantity you want to sell. Each time a deal is sold, the number reduces automatically. At zero the deal is no longer available.
Deal Terms should only be used for terms specific to this deal e.g. “Must include a full price Cut & Finish” on a colour deal. Terms for ALL Late Deals can be added in settings. Terms for a whole group of deals like Nails can be added in Groups.
Technician/Stylist can be the name of a specific stylist or a level like Style Director. Naming the person gives you less flexibility.
Group/Location uses the Locations you have already set-up (see above) or Groups (see later). This setting is for grouping the deals on the display page. It could be multiple salons or departments. Emails/Messages – at the moment we only use the default. Do not change this (yet).
Permanent Deals - NEW feature
We have added a new feature that means you can add deals that are ALWAYS live.
After choosing an Icon and Title the next question is Permanent Yes/No. If you choose Yes then the Deal does not use the Start/End dates or the How Many (quantity). This means you can add your regular deals just once and never need to update them.
Addons or SuperSize Deals gives you the chance to add upgrades onto any deal. For example, perhaps you want to sell an OLAPLEX service with a Hair Colour deal. Just tick which upgrades are available for this deal from the table you need to have created (see Addons below).
After a Deal has been added, use the orange Edit button to change anything.
Use the red Delete button to remove a deal.
Use the pink button to add a deal as a Favourite (see more below).
Expired Deals allows you to see all old deals past their expiry date separated in tabs by location. From here you can use the pink button to add to your favourites list.
Favourite Deals are a great way to add all your regular deals each week and are shown tabbed by location. You can edit (orange button) or delete (red button) . Tick all the deals you want to publish, select the Display From and To dates and then click Publish Selected Deals.
Deal Addons or SuperSize Deals is the last item in the Late Deals menu on the left. It lets you create a table of all your addons/upgrades. This table is then available when you add a deal to choose the upgrades that are relevant.
Add a suitable Title(e.g. Olaplex Treatment), Details and Terms. Then add the Original and Addon price (you don't have to offer a discount).
A copy is sent to the email in the company settings page and a copy to the email on the location if different. This is useful if you want reception to manage claims and also see them in head Office.
But rather than just relying on the emails, we have a Claims page on YourSalon.co. Access this on the left menu using Claims.
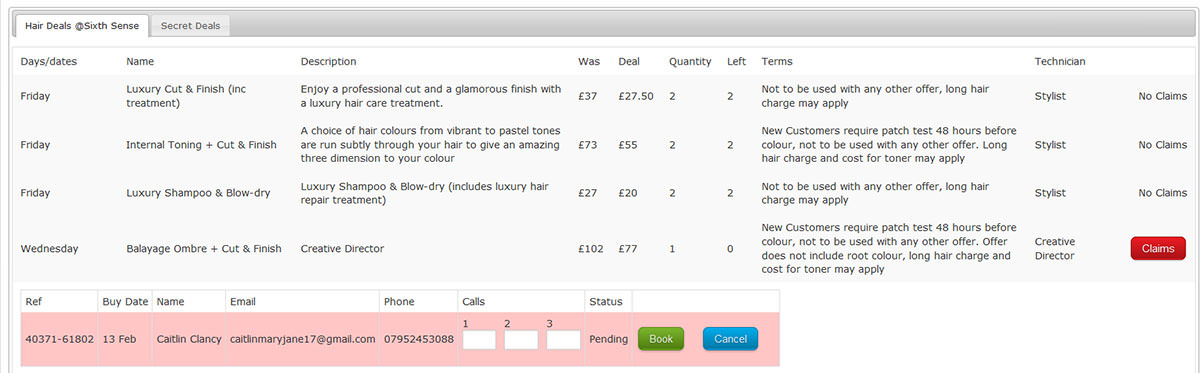
On this page you can see all your current Active deals.
If you have more than one Location or Group they are separated into tabs.
If there has been a claim/purchase the Claims button will appear on the right. It is red if there are actions to take, grey if already dealt with.
Clicking the Claims button opens a section that shows all the information needed to contact the client.
On a red claim to be dealt with you can “book” the client i.e. mark as booked into the salon. Or enter your initials into box 1 if you called them. Boxes 2 and 3 allow you to enter initials for 2 more calls if you can’t get through.
Once you have added 3 sets on initials, a new button appears to “send email”. This sends an automatic email to the client to say you could not get hold of them and they need to reclaim the deal.
For those salons using Paypal you have the option to “Refund” and return all the money to the client including our fee.
The page also shows deals that are now inactive (past their end date) for 3 days. This means you can see what deals still may need chasing even though no longer on your website.
If you want to look further back use the menu Expired Deals.
Deleted deals also show (until expired) so that you don’t lose a deal that had claims if you delete by mistake.